


![]() Thu Feb 08, 2007 1:00 pm
Thu Feb 08, 2007 1:00 pm
how to make your own custom icons
it took me all day yester day to get them to work right but they do now so i was thinking i would share the info
in this tutorial i am using photo shop (i love that thing )
)
step 1. get your icon (i recommend this site if you want some premade http://www.iconarchive.com/index.php) or you can make one from scratch.

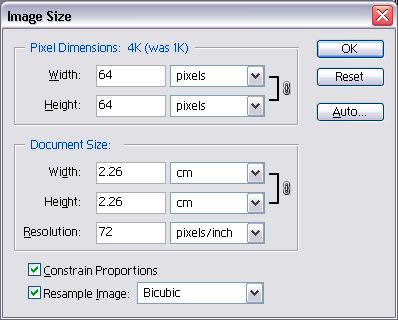
step 2. now that we have the icon we must resize it to do this just go to image on the topbar and select image size or canvus size depending on if you need to make the whole image bigger or just the border.
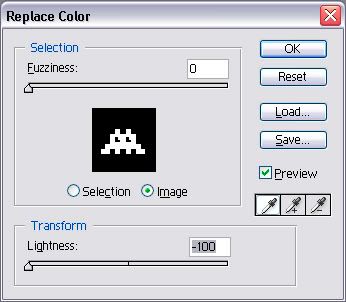
step 3. now that the image is the right size you need to make sure the background is a true black i do this by going to image on the topbar and then adjustments and then replace colour. select the background of the image and put the options to the left to get a true black (that will be the transparent part of the icon)
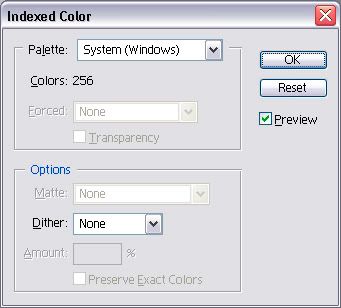
step 4. now set the colours to the correct setting. go to image on the topbar and than to mode (if it is in grey scale select rgb than go back into it and) than select indexed now in this screen set palette to system (windows).
step 5. now save the icon as a .bmp and name it the number corresponding to its place in the xmb
if you need any help making the Topmenu_plugin.rco check out "asddasit" tutorial here
in this tutorial i am using photo shop (i love that thing
step 1. get your icon (i recommend this site if you want some premade http://www.iconarchive.com/index.php) or you can make one from scratch.
step 2. now that we have the icon we must resize it to do this just go to image on the topbar and select image size or canvus size depending on if you need to make the whole image bigger or just the border.
step 3. now that the image is the right size you need to make sure the background is a true black i do this by going to image on the topbar and then adjustments and then replace colour. select the background of the image and put the options to the left to get a true black (that will be the transparent part of the icon)
step 4. now set the colours to the correct setting. go to image on the topbar and than to mode (if it is in grey scale select rgb than go back into it and) than select indexed now in this screen set palette to system (windows).
step 5. now save the icon as a .bmp and name it the number corresponding to its place in the xmb
- 1.bmp = settings
- 2.bmp = photo
- 3.bmp = music
- 4.bmp = video
- 5.bmp = game
- 6.bmp = network
if you need any help making the Topmenu_plugin.rco check out "asddasit" tutorial here


